Adding custom CSS or JavaScript to a theme is quite simple, you don’t even need to change the theme files.
1. Overwrite the head.html File
It’s best to make changes to your own Hugo repo, without touching the theme files. Therefore we need to overwrite the layout files.
In this case, the file we want to edit is located in the following path (within the theme repo).
hugo -> themes -> actual-theme -> layouts -> partials -> head.htmlTo make a local copy of it, just create a new file with the same name in the following folder and copy the content.
layouts -> partials -> head.html2. Add Path the Files in the config.toml File
We want to specify which files we want within the config.toml file to make it easy to add new files. We just need to add the following lines:
custom_css = ["css/custom.css"]
custom_js = ["js/custom.js"]
This will point to a css and a js file that we will create soon.
3. Add to head.html
Time for the actual logic, we just place this line of code somewhere within the head.html.
// css
{{ range .Site.Params.custom_css -}}
    <link rel="stylesheet" href="{{ . | absURL }}">
{{- end }}

// javascript
{{ range .Site.Params.custom_js -}}
    <script type="text/javascript" src="{{ . | absURL }}"></script>
{{- end }}
For each file we have declared in our config.toml, it will add a link to that in our head.
4. Add the CSS and JavaScript Files
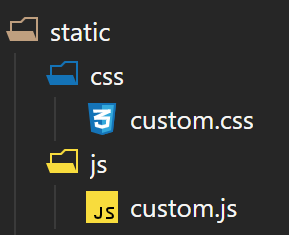
The files need to be added to the static folder within our Hugo repo. CSS files in the css folder, and JavaScript files in the js folder.